The 2026 Best Low Voltage Lights guide begins with a frustrating question: “why are my low voltage lights burning out quickly?” A lamp may glow beautifully for a few evenings, then fail beside a damp pathway. The cause is rarely the bulb alone. Voltage instability, trapped heat, loose connectors, water intrusion, and overloaded transformers can shorten its life.
Mike Gambino, founder of Gambino Landscape Lighting, has said, “Quality lighting is not expensive; it is an investment in safety, beauty, and value.” That principle matters when choosing low voltage fixtures. Experienced installers inspect the entire circuit, not just the failed lamp. They measure voltage at the transformer and at the farthest fixture. A reading that drops too low can cause dim output. Excessive voltage can burn lamps prematurely. Both problems can look similar.
Small details matter. A buried connector may collect moisture. A fixture placed against hot soil may lose airflow. A transformer rated near its maximum capacity may struggle after adding one more spotlight. I have also seen homeowners replace bulbs repeatedly without checking the cable layout. That is understandable, but incomplete.
This guide compares reliable 2026 low voltage lights, transformer capacity, cable quality, and weather-resistant connections. It also examines where installation advice becomes uncertain. Not every failure has one obvious answer. Sometimes, the wiring deserves more suspicion than the fixture.
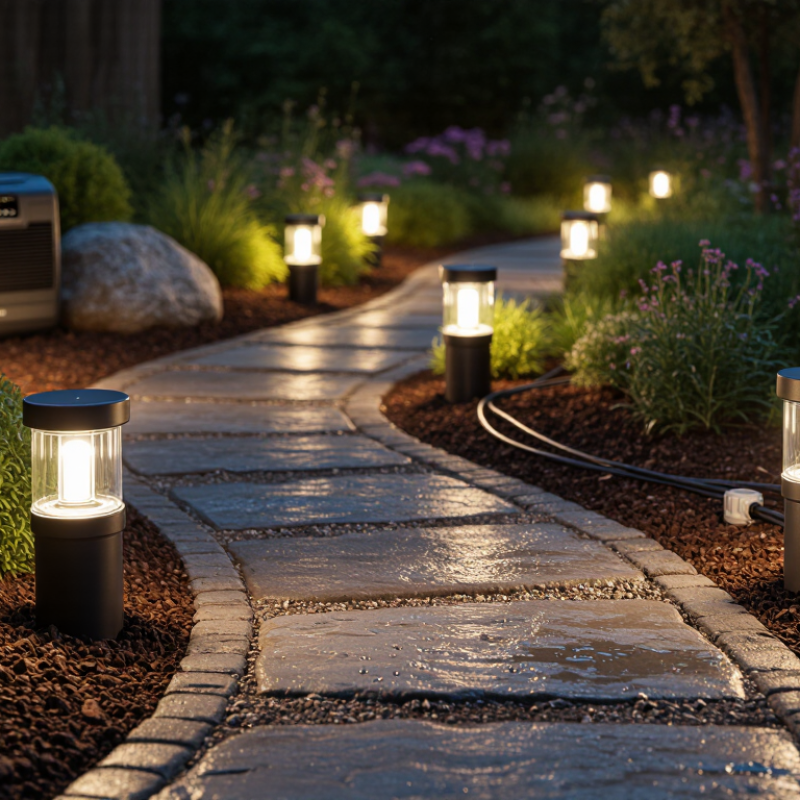
Low-voltage lights usually operate at 12 or 24 volts, supplied by a transformer connected to household power. The transformer reduces voltage before electricity travels through outdoor cables. A typical system includes the transformer, timer or photocell, cable, connectors, and light fixtures. Every part affects performance.
In real installations, early failure often begins with incorrect voltage. A 12-volt fixture may overheat when the transformer delivers excessive output. Long cable runs create voltage drop, making distant lights dimmer and forcing some components to work harder. Undersized transformers can also overheat under continuous load. Check the total wattage, then allow spare capacity. It is a small detail.
Moisture causes trouble too. Water can enter loose connectors, corrode copper, and create unstable electrical resistance. Heat trapped inside sealed fixtures may damage the LED driver, even when the LED itself remains functional. Use outdoor-rated connectors, keep cable joints above standing water, and inspect damaged insulation each season. A multimeter can reveal abnormal voltage at both the transformer and the farthest fixture. Do not assume a failed lamp is the only problem. In my view, replacing bulbs without testing the system is a common mistake, and I have made that assumption before. Voltage readings, load calculations, and careful connector inspections provide more reliable evidence than appearance alone.
| Lighting Type or System Part | Typical Electrical Rating | How It Works | Typical Rated Life | Main Causes of Early Failure | Useful Checks | Practical Reliability Guidance |
|---|---|---|---|---|---|---|
| Low-voltage halogen lamp | Commonly 12 V AC; some systems use other manufacturer-specified voltages | An electric current heats a tungsten filament inside a quartz capsule. Halogen gas helps return evaporated tungsten to the filament. | Usually about 2,000–4,000 hours, depending on lamp design and operating conditions | Overvoltage, fingerprints or oil on the quartz capsule, vibration, frequent switching, poor contacts, and excessive heat | Measure voltage at the lamp under load, inspect the socket, and check for darkening, loose terminals, or damaged wiring. | Do not touch the quartz capsule with bare fingers. Use the specified voltage and provide adequate ventilation around enclosed fixtures. |
| Low-voltage LED lamp or integrated LED fixture | Commonly 12 V or 24 V DC; some products accept 12 V AC/DC | LED chips convert electrical energy into light. A driver or current-regulation circuit controls the electrical input and helps manage heat. | Often about 15,000–50,000 hours when operated within rated temperature and electrical limits | Excess heat, incorrect voltage type, incompatible dimming, water entry, poor-quality connectors, and driver or capacitor failure | Confirm AC/DC compatibility, measure operating voltage, inspect the driver, and check whether the fixture is installed in a hot or sealed location. | Choose a fixture with suitable heat dissipation, use the correct driver, keep connections dry, and follow the specified dimmer requirements. |
| Transformer or power supply | Input is usually household mains; output is commonly 12 V or 24 V AC/DC | It reduces or converts the supply voltage to a level suitable for low-voltage lamps. Electronic supplies may also regulate or switch the output. | Frequently 10–20 years, but actual service life depends strongly on heat, load, moisture, and component quality | Overloading, underloading an electronic transformer, poor ventilation, voltage spikes, moisture, loose terminals, and aging internal components | Check output voltage with the lights operating, compare total load with the rated capacity, and inspect for overheating, buzzing, or corrosion. | Keep the total load within the rated range. Install the transformer in a dry, ventilated location and allow access for maintenance. |
| Long cable run | Voltage depends on transformer output, cable length, conductor size, and connected load | Every cable has resistance. Current flowing through the resistance creates voltage drop, especially on long runs or with undersized conductors. | Not applicable as a lamp life rating; excessive voltage drop can cause dimming, flicker, or unstable operation | Long distances, thin cable, high current, corroded joints, and several fixtures connected to one small cable | Measure voltage at the transformer and again at the farthest fixture while the complete load is switched on. | Use appropriately sized cable, distribute loads across circuits, and keep connectors clean, tight, sealed, and accessible. |
| Connector, socket, or junction | Must be rated for the system voltage, current, environment, and wire size | These parts provide the electrical path between the transformer, cable, and fixture. A poor connection increases resistance and heat. | Potentially many years when correctly installed and protected | Loose screws, oxidation, water intrusion, incompatible metals, damaged insulation, and repeated mechanical stress | Turn off power before inspection. Look for discoloration, melted plastic, corrosion, loose conductors, or intermittent flickering. | Use weather-rated components outdoors, make mechanically secure connections, and protect joints from standing water and soil movement. |
| Outdoor in-ground or landscape fixture | Commonly 12 V or 24 V, according to the fixture specification | The fixture distributes low-voltage power to a lamp or LED module while its housing protects electrical parts from the environment. | Depends on the lamp, LED module, seals, drainage, and installation conditions | Water ingress, blocked drainage, soil contact, corrosion, lawn equipment impact, extreme heat, and cable damage | Inspect seals, lenses, cable entry points, drainage openings, and the fixture base. Test the fixture after rain if intermittent faults occur. | Use products with an outdoor rating suitable for the location. Keep drainage clear and avoid burying connections unless they are specifically rated for burial. |
| Dimmer or control system | Must match the lamp type, voltage type, minimum load, and maximum load | The control changes the electrical power delivered to the lamp. Some controls work with leading-edge loads, while others require trailing-edge or LED-specific compatibility. | Varies by device and operating temperature | Incompatible dimmer, load below the minimum rating, excessive load, poor wiring, or control-induced flicker and heat | Temporarily bypass the dimmer with power off and proper safety procedures, then verify whether the symptoms disappear. Check the control specifications. | Use a control specifically approved for the lamp and driver. Avoid mixing incompatible lamp types on one control circuit. |
| System voltage condition | Should remain within the lamp or fixture manufacturer's stated operating range | The lamp receives the voltage supplied by the transformer or driver. Even a modest increase in voltage can substantially shorten the life of incandescent or halogen filaments. | Not a separate component rating; voltage directly affects brightness, heat, and service life | Incorrect transformer output, utility variation, unloaded electronic supply, wiring faults, or measurement taken without the normal load | Measure at the fixture while operating. Compare the reading with the fixture rating and repeat the test at both the supply and load ends. | Correct the supply problem before replacing lamps repeatedly. Do not use a higher-voltage source to compensate for dim lights without checking the system. |
| Total connected load | Transformer capacity is commonly expressed in watts or volt-amperes; connected load must remain within its rating | Each lamp draws power from the same supply. The total demand is the sum of the individual loads, with some LED drivers also producing startup current. | Not applicable; incorrect loading can reduce the life of the transformer and connected lamps | Too many lamps, mixed lamp technologies, excessive startup demand, overloaded cables, or poor load distribution | Add the actual lamp wattages, compare them with the transformer rating, and measure output voltage while all fixtures are operating. | Leave reasonable capacity for future additions and follow the transformer's minimum-load requirement when using electronic supplies. |
| Most likely symptom pattern | Depends on the failure mode | Different symptoms can help separate a lamp problem from a supply, wiring, or environmental problem. | Not applicable | Repeated lamp failure at one fixture often indicates heat, moisture, socket, or local wiring trouble; repeated failure across a circuit may indicate voltage or transformer problems. |
One fixture fails repeatedly
— inspect the fixture and connection. Several fixtures fail together — test the transformer, voltage, and circuit load. Only flickers when dimmed — check control compatibility. |
Diagnose the complete system rather than replacing lamps alone. Always disconnect power before working on wiring and follow applicable electrical codes. |
Technical values are general industry ranges. Always confirm the exact voltage, load, environmental rating, dimming method, and service-life specification on the product documentation before installation.
They usually operate at 12 or 24 volts. A transformer reduces household voltage before power reaches outdoor fixtures. The system also includes cables, connectors, and controls.
Unstable voltage is a common cause. Excessive voltage can overheat a fixture, while low voltage can make distant lights dim and unreliable. It happens.
Long cable runs can create voltage drop. Fixtures near the cable’s end may look dimmer and fail earlier, especially when many lights share one circuit.
Yes. A transformer carrying too much continuous load may overheat. Calculate total wattage and leave spare capacity for safer operation.
Water can enter loose connectors and sockets. Corrosion increases resistance, creates heat, and weakens electrical connections after rain or irrigation.
Use outdoor-rated connectors and keep cable joints above standing water. Inspect insulation each season, especially near soil, mulch, and dense plants.
Heat trapped inside a sealed fixture can damage its driver. The LED may remain functional, but the supporting electronics may fail.
Measure voltage at the transformer and the farthest fixture. Check total wattage, connectors, rust, water, and loose wires. Replacing bulbs alone may miss the real fault.
Ask for help when failures continue after basic checks. Testing the circuit under load can reveal problems that visual inspection misses. I once assumed the bulb was defective.
Low-voltage lighting systems use a transformer to reduce household electricity to a safer, lower voltage for outdoor and decorative fixtures. Although these lights are designed for reliable operation, bulbs may burn out quickly because of excessive voltage, unstable power, moisture, heat, poor-quality connections, or incorrect bulb selection. If you are wondering, “why are my low voltage lights burning out quickly,” the problem may involve more than the bulbs themselves.
Start by checking the transformer’s output, total system load, cable size, wire length, and every connection for looseness, corrosion, or water damage. Inspect fixtures for trapped heat and make sure bulbs match the system’s voltage and wattage requirements. Replacing damaged sockets, improving waterproofing, balancing the circuit load, and installing suitable long-lasting bulbs can help prevent repeated failures. Regular cleaning and seasonal inspections also support better performance and extend the life of the entire lighting system.

 Cappy Light